Please be courteous and don't claim any of my work as your own.
Showing posts with label Tutorial. Show all posts

Wednesday, May 9, 2012

My Save it all Action- Create your own

This tutorial may seem long, but just go step by step and it should come together.

Here's what my action looks like:

Let me walk you through so you can record your own action, all you have to do his press record and follow the steps. Then press stop and you have your own action.

You'll need to have a completed layered layout open while we create the action, we will perform each of the steps on the layout and record them as we go along.

First you're going to want to press Create a New Action

Name it whatever you like, as you can see, mine is named "Save it all Sarah" (catchy right?)

It should automatically start the recording, if not press Record.

First we will remove the unused/hidden layers on the layout.


Select File; Scripts; Browse

Now remember where you saved the scripts and select CVW_DeleteNonVisible

A dialog box will pop up confirming you want to delete the non visible layers, click yes.

Now we are going to run a supply tracker- 

NOTE: this only works if your layers are named appropriately. So make sure your layers are named with the designer name, kit name or any other info that will help you track the credits. If you need to name your layers, press stop, name your layers, then press record and continue on with the directions.

Select File; Scripts; Browse

Now remember where you saved the scripts and select CVW_SupplyTracker

A dialog box will pop up confirming you want to track visible layers, click yes.

The script will run, and place a new text layer on your document, your supply list will also be inserted into the metadata of the file.

Now lets look at the next step in my action


My action says play action for the first two steps, but yours will say Scripts instead.

Now we are going to call another script

Select File; Scripts; Browse

Now remember where you saved the scripts and select CVW_FileSave1

This dialog box will pop up:


I change the selections like so:

Now I just figured out last weekend that you can change the numbers in the boxes! So if you want to save at a specific size, either for printing or for web, you just check the box and enter your desired size. For example an 8x8 layout is 2400 pixels. The DHD blog is currently 450 pixels wide so I can save my layout for the blog easily. Thanks Erica and Sandy for helping me figure that out- seriously saving me time on my process!

Back to the action:

Find the side menu for the action palette:


Click insert Stop and
 paste the following into the dialog box that comes up, also check the box that says allow continue.

Paste this:     Now open the 600 Pixel file that was previously saved

Click the side menu for the action palette again, now select insert menu item:

You will see this dialog box:

Don't click that blue OK yet!

Select File; Open

Now click the blue OK button.

Press the stop button on the action player, we are going to take a break here to talk about saving for the web. I like to resize my web previews, sharpen and export for the web. In order to do this I use part of someone else's action (did you know you can load actions and copy parts of them to customize your actions?) I use part of the resize for web action from Paislee Press. Download, unzip and install the action.

Here's what the action looks like installed in my program:

We are going to move the commands: Image Size, Convert to Profile current document, Unsharp mask, and Export. (we don't need the Stop command) Add these after the open command we recorded earlier.

Marlene asked how to move- highlight the parts we want, click and drag them to the correct position in our new action + I forgot to say, you should probably delete the remaining parts of the action, just to keep things neat and clean :)

Now double click on the unsharp mask command- enter the following values:


Click OK

I have a final command at the end of my action to close the 600 pixel file. So, click once on the export command, then press record and close the file that is open. Click the stop button.

We're done!

I know this is an involved process, but I love the results and it really does save me time because I'm not having to go through a saving process for each of the sizes that I need.

Let me know if you have questions and I'll do my best to answer them! 

Wednesday, May 2, 2012

iNSD Bloghop - Design House Digital

Welcome to the DHD iNSD Bloghop. (enough acronyms for you?)

As you hop along the blogs, make sure to gather up the letters, when you enter them in the coupon code area of check out you will get this great kit for free! (just add the kit to your cart first)

Not only do you get this fab kit, but you can enter to win other amazing prizes!
I will be giving away a DHD gift certificate. Make sure to enter using the Rafflecopter widget so all your entries are counted.

If you participate in the DHD iNSD layout challenge, you can be entered to win a digital frame. 

At DHD we really know how to throw a party!

Today tutorial is part of my process of saving my layouts. I have a rather involved process for saving my layouts, but I recorded it all into an action and now all I have to do is push one button and everything is done for me.

The biggest secret to my whole process are the scripts from Speed Scraps


I use: 
Delete Non-Visible
Supply Tracker
File Save 1 

After you download and unzip these scripts take note of where you have them saved, you'll need this to make your action. 

The other script that is a huge help is Copy Close.
This script will take all our open PNG and JPEG files and add them as layers to your PSD document. While it is copying them into the PSD it is also naming the layers, it copies the filename of eachPNG or JPG and uses that as the layer name. This is really helpful for tracking your credits. 

I'll continue this tutorial in another post so you can get hopping on the blog hop, but make sure to check back so you can create your own saving action.

Your instruction for the layout challenge: 2 or more lines of journaling


Enter to win the Gift card: (make sure to use the rafflecopter widget so all your entries count)
Enter up to 5 times

Thursday, April 22, 2010

Project 4- Or the Reincarnation of the purple sparkle fabric


Remember this piece of purple fabric??


I used part of it to make this:
Now I have two smallish scraps left and I have plan.

Gather supplies- You will need:
Scraps of fabric
Scraps of batting or fleece
a piece of card or an old file folder
A pattern- you can make your own by tracing the clip and adding 1/4 inch all the way around for the top pattern and then only add 1/8 inch for the batting and the bottom. Or get my pattern
2 snap clips- you can get these at the dollar store or sometimes I find them in the quilting section of the superstore labeled hem clips. 
Needle and Thread
Embellishments


Trace and cut out the decorative fabric. Trace and cut out he bottom fabric and the batting or fleece. Mark the small line on your bottom fabric. 

Layer your pieces as shown:
Clip
Batting
Fabric


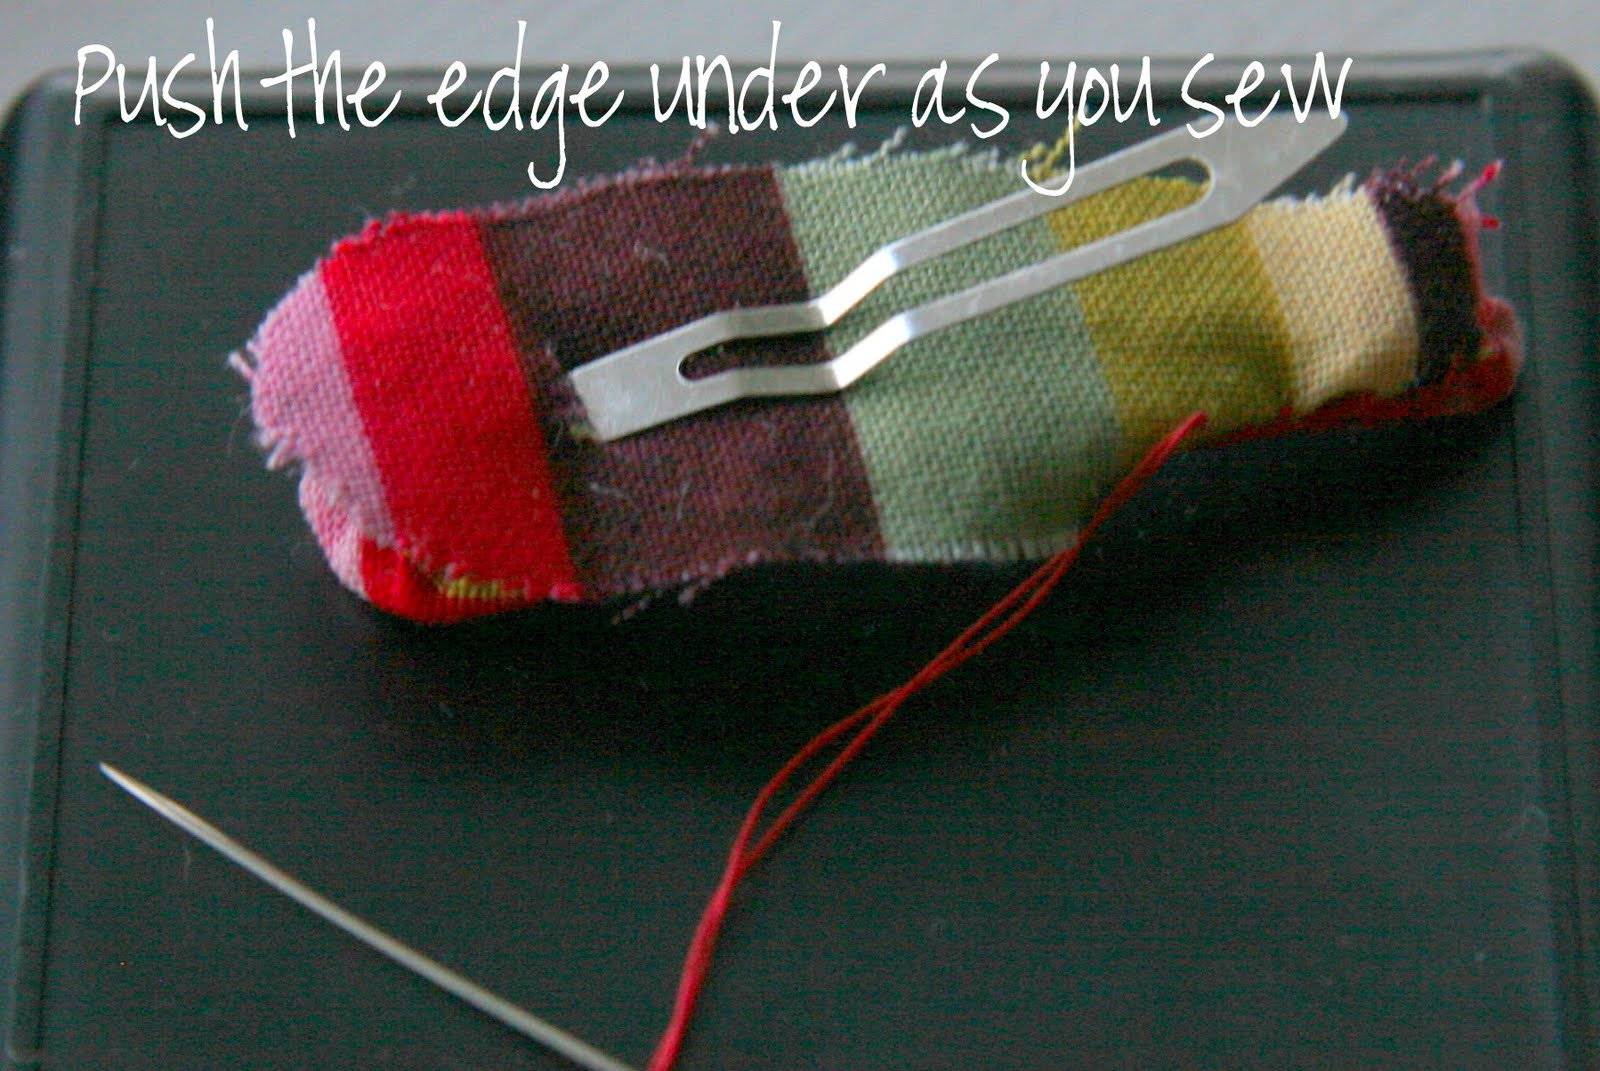
Using a running stitch (up, down, up, down) go around the large end and then pull tight. It will gather like above. Then start sewing the fabric back and forth under the prong. This doesn't have to be pretty, it will be covered up with the bottom piece. When you get to the small end, do another running stitch and pull it tight make a couple more stitches to keep it secure. 

Don't Cut your thread now!! 

Fold the bottom piece in half and cut a small slit on the line from the template. Slide the fabric onto the prong and place on the back of the clip. 


Now you will be turning the edges of the bottom under with the needle and stitching it in place. Stitch all the way around the clip, keeping your stitches small and on the bottom of the clip.


Forgive the blurriness, she's 2


Wear it, or add more decorations like buttons, sequins or beads. If you wanted embroidery on the clip, I suggest embroidering through the top fabric and the batting before sewing it onto the clip.

These clips hold really well in my fine hair and have been known to stay in my 4 year-olds hair ALL day!

Wednesday, April 21, 2010

Project 3


This time I used some of the yarn that was included in the stash. Then I added yarn I've had sitting around waiting for the right project.

So with out further ado- I present my take on 

Wool Dryer Balls


1: Start winding the yarn, I am using acrylic yarn from the envelope, but keep in mind that the outside of the ball will be wool so that it can felt and not become a big tangled wad of yarn. As you wind, keep it really tight- this will stretch out the yarn, keep it on the ball and it hurt my hands a bit by the end. (See how tight the light purple yarn is wrapped- compared to the darker one?)

2: My first finished core. To secure the end of the yarn, locate one of your recent passes around the ball and slip the end of the yarn under that 2-3 times and then pull really hard. Mine tied into a smooth know and I pulled so hard the yarn end snapped off. 

3: 2 Cores ready for some wool. Each is about 2 inches in diameter. It doesn't matter what colors or textures are in the core, they will be completely covered with wool. 

4: The beginning of the process of wrapping the wool. Can you tell I'm still wrapping very tightly? Now keep wrapping and wrapping and wrapping- this is a good mindless project to watch a good movie or if you're so inclined- Brothers and Sisters.


1: These both have one layer of wool, I just used what I had left from making a couple of soakers. 

2: Keep wrapping....

3: And more wrapping.... (that light blue yarn was pretty fine and I used and entire skein on the two balls) these do take a good amount of yarn so the more you can use a cheaper yarn like an acrylic, for your core the less wool you will need)

4: These are complete except for felting. They almost bounce- and they are about the size of tennis balls.

This may look a little strange- but it works!

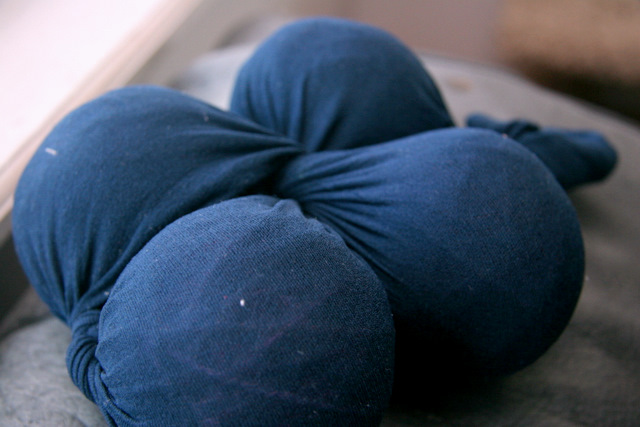
Place the balls in an old nylon or stocking, tying a knot in between each ball. We want them to felt individually instead of one big lump.  I didn't want to keep untying knots to check them after each cycle, so they are tied in a twisting series of knots.

After you have secured your stocking, place in the washer with your regular laundry. Hot water and lots of agitation will felt faster. I left mine in while i washed about 5-6 loads of laundry. 

And the Reveal:

Can you tell that they are more fuzzy?? It's really hard to catch this on camera. I decided they were ready when I tried to move some of the threads and they were very secure.  

I made 4 and plan to use them all at the same time. We have been using the plastic ones we bought in the grocery store, but they break and some people are concerned about the fumes that plastic could release when heated. Since starting to use the dryer balls, we haven't needed fabric softener or sheets which is great for our budget and there is less residue in the washer and dryer.


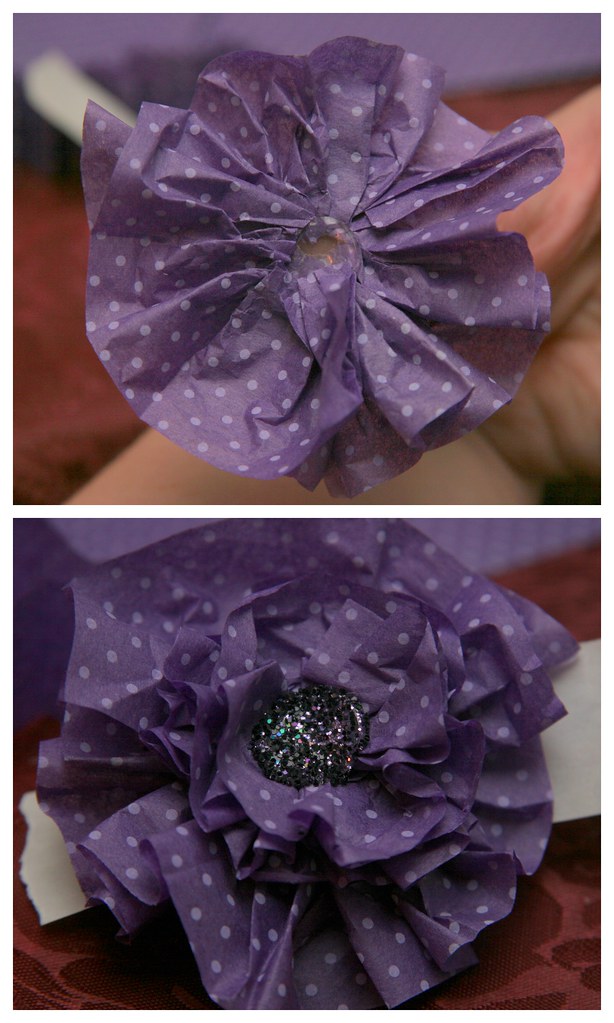
Tissue Paper Flowers


This time I cut strips of tissue paper and played until I had flowers.
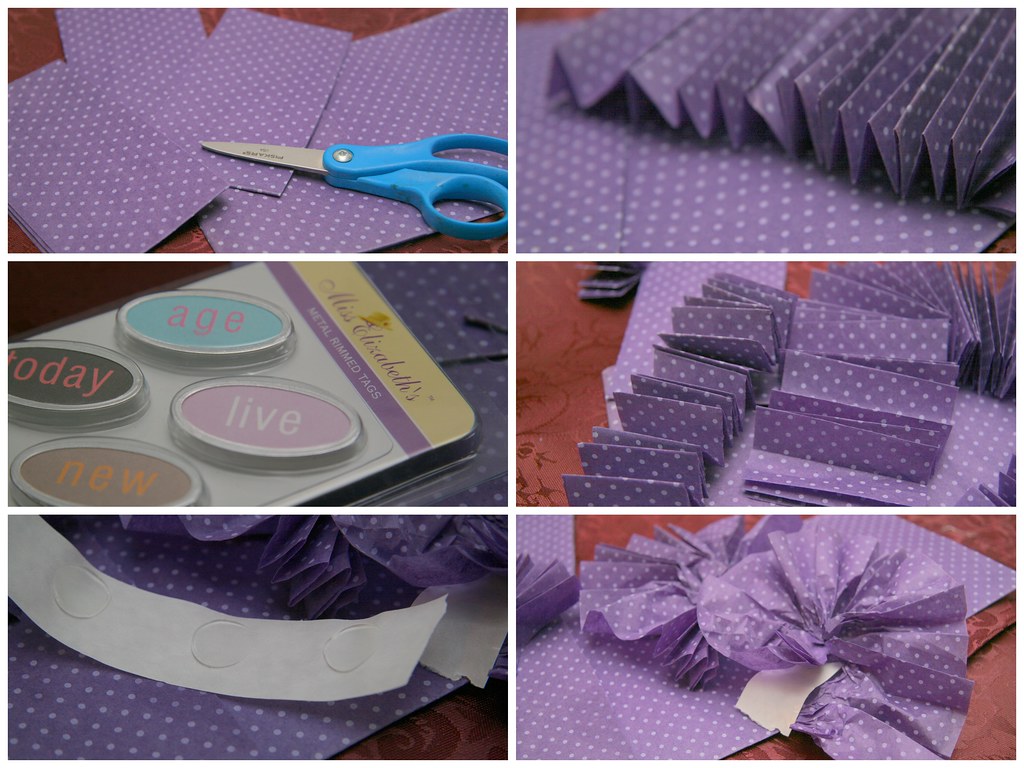
I used the Tissue paper in the envelope, the word tags, and added in some glue dots and scissors from my stash.

I accordion folded the paper first, and then decided that I needed some thinner strips so I cut some in half-ish. Then I just started gathering up the paper and sticking it to my glue dot. The folds made the flower have a better "ruffle" effect than if I'd just gathered up the paper. 

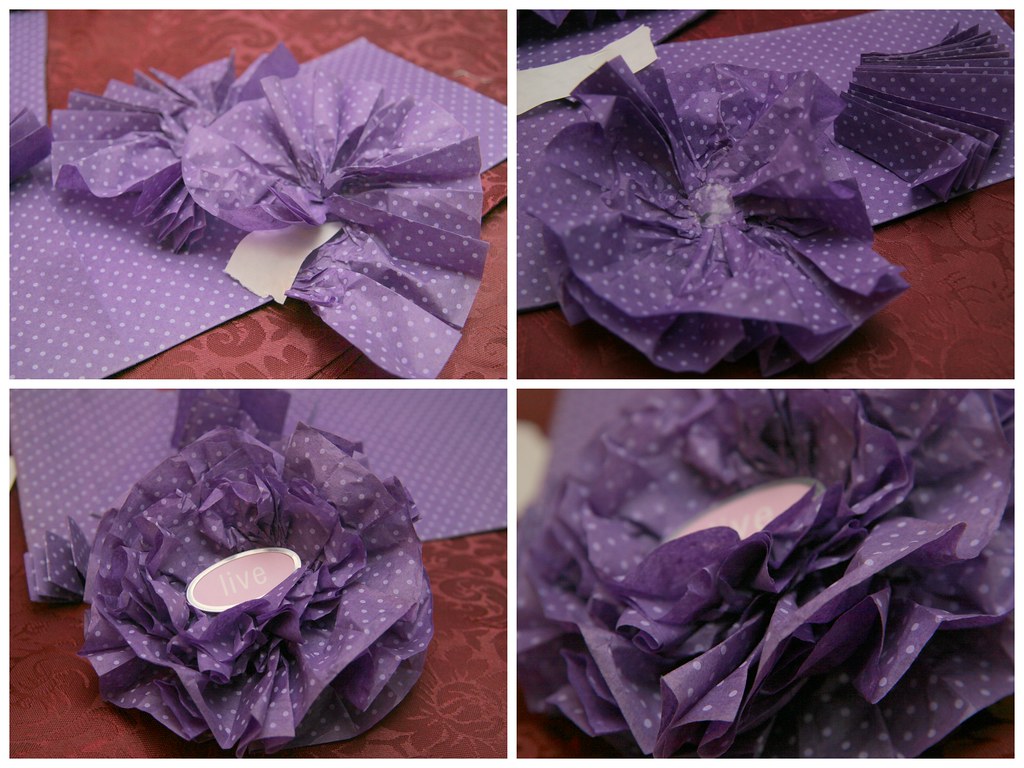
After a layer of paper fills a glue dot, add another and keep building. I did three large layers and two small ones. Then add a couple more glue dots and stick on the tag. It might be easier to stick the glue on the tag first to make sure it's all covered.

I made a second flower that was a little smaller, I used my thumb as the base and only used one large layer and one small layer, then instead of a tag, I sprinkled glitter (from the envelope) on the final glue dot. 


Now I have two pretty flowers, but I'm not sure what to use them for. My girls love flowers, but they play so hard that I can just see them with a soggy mess of tissue in their hair and purple dye running down their faces if I put them on some kid of clip.

I'll take any suggestions, what do you think they would be good for?